The 5-Minute Mantel Routine That Saved Me $200 a Year
Gather Your Inspiration
Have you ever walked into your living room and thought, something is wrong but I cannot figure out what? Often, it just takes a little inspiration to spark the creativity you need. Begin your mantel decorating routine by gathering images and ideas that warm your heart. Grandma always said, ‘A little inspiration goes a long way.’ Look through magazines, Pinterest, or even family photos to find that cozy vibe you want.
- Collect photos of mantels you love.
- Consider the styles that resonate with you—farmhouse, vintage, or modern.
Remember, it’s all about creating a homely touch that reflects your family’s personality. Grandma would be proud of this result because it’s all about making your space feel like home!
Rearranging furniture is the #1 free way to make any room feel brand new.
Most people rush through this — don’t:
Choose a Theme
Once you have your inspiration, it’s time to settle on a theme. Seasonal themes can be a delightful way to keep your mantel feeling fresh throughout the year. Grandma always emphasized this part: ‘A well-decorated mantel tells a story.’ Whether it’s a cozy fall vibe with pumpkins or a bright spring look with flowers, pick what makes your heart sing.
- Use seasonal colors as your guide.
- Incorporate elements like candles or natural elements that match your theme.
Choosing a theme will simplify your decoration process and ensure everything feels cohesive. Just like Grandma’s simple but intentional decorating style, your mantel should tell a beautiful story.
Clear the Clutter
Before you start decorating, it’s important to clear off any clutter. Grandma always said, ‘A clean slate allows for new beginnings.’ Take everything off your mantel, dust it off, and assess what you have. This is the perfect time to declutter items that no longer spark joy.
- Consider donating or repurposing items you don’t love.
- Keep only the pieces that hold sentimental value or that you truly enjoy.
This process may reveal hidden treasures that you can incorporate into your new design or remind you of cherished memories. Plus, a clean mantel is a blank canvas just waiting for your creative touch!
Bookmark this for your next weekend project
Select Your Core Pieces
Now that you have a clean slate and a theme, it’s time to select the core pieces for your mantel. These will be your statement items that anchor your design. Grandma’s old-fashioned trick was to start with a larger piece—like a mirror or a piece of art—before layering in smaller items.
- Choose one or two larger items to serve as focal points.
- Layer in smaller decorative pieces like vases or books that complement your focal points.
Creating layers adds depth and interest, much like the way Grandma layered her favorite quilts on cold nights. Remember, less is often more, so choose wisely!
This is the step that separates good from great:
Add Textures and Heights
Grandma knew that textures and heights bring a mantel to life. When arranging your décor, think about the various materials—wood, glass, metal, and fabric—and incorporate them for a rich look. Varying the heights of your items can also draw the eye in and create visual interest.
- Stack books to add height.
- Mix materials—try a wooden bowl next to a metal lantern.
These small changes can elevate your mantel from ordinary to extraordinary. The cheapest option turned out to be the best one when I added a simple wooden crate as a base for my centerpiece!
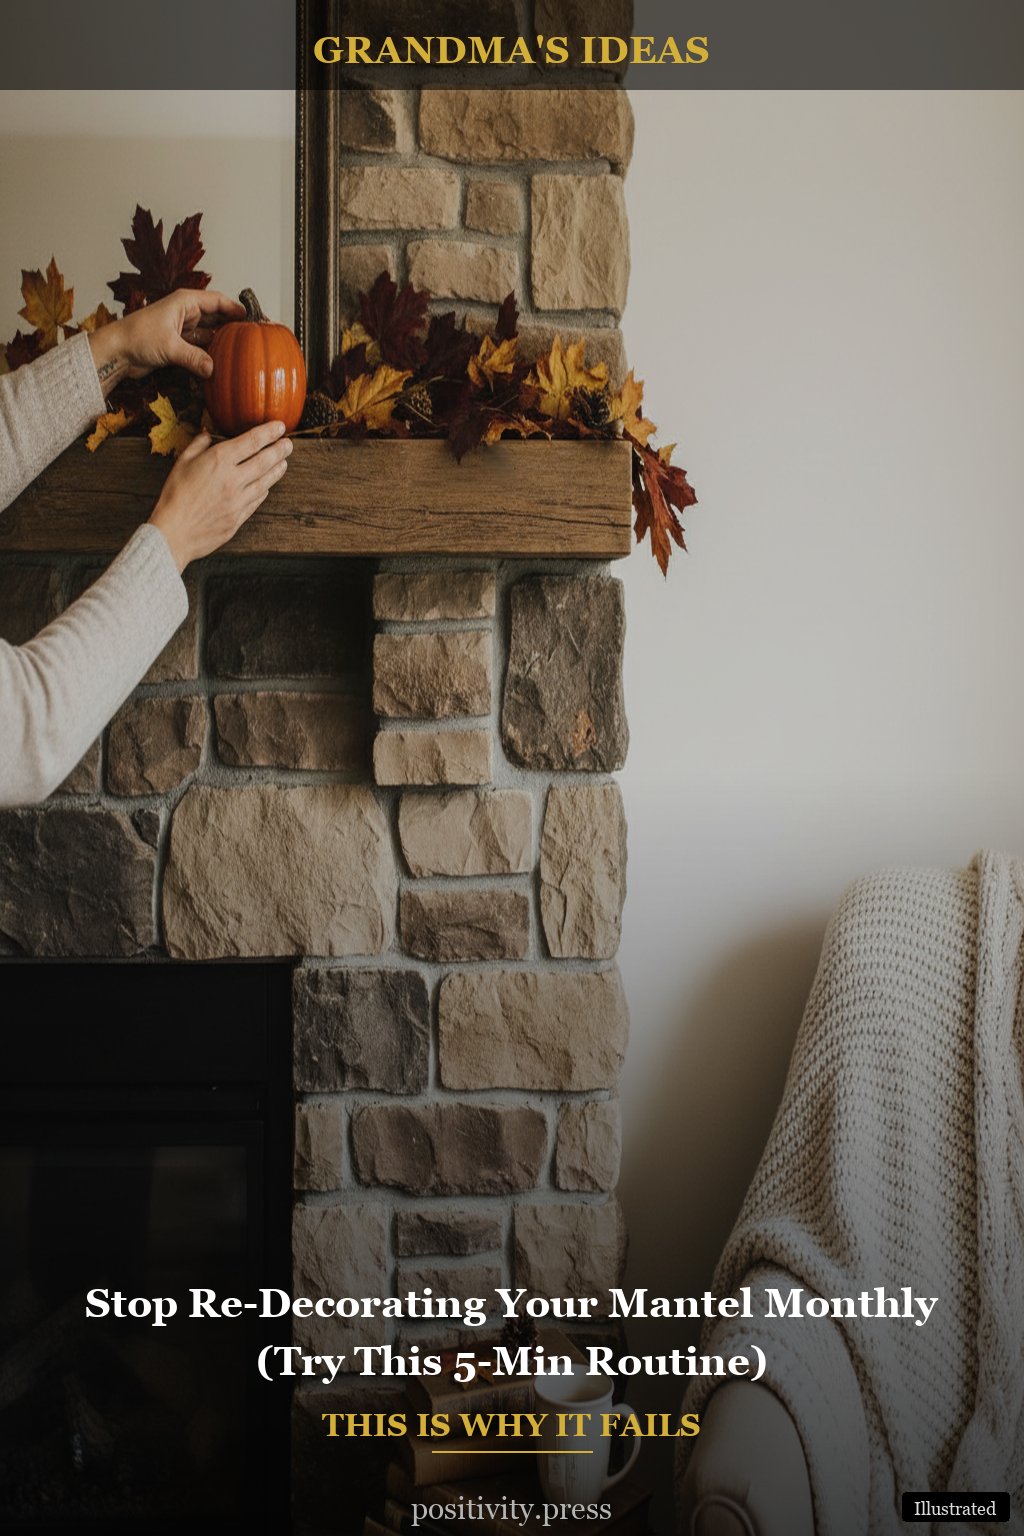
Incorporate Seasonal Elements
One of the joys of decorating, as Grandma knew, is the seasonal shift. Keep your mantel feeling fresh by changing out small elements with the seasons. Try swapping in seasonal flowers, pinecones in the fall, or fresh greenery in the spring.
- Use faux elements for ease and longevity.
- Rotate items to fit the season—this keeps things new without starting from scratch!
Grandma often had a stash of seasonal decorations that she would pull from every year. You’ll find it brings delight to your family and guests alike, sparking conversations and adding a warm, homely touch to your space.
Finishing Touches
After you’ve placed your core pieces and seasonal elements, it’s time for the finishing touches. These are the small details that tie everything together. Grandma always had a knack for knowing just what to add—a few well-placed candles, a cherished photo, or even a lovely piece of fabric can do wonders.
- Try adding a garland for a cozy feel.
- Consider a small bowl of seasonal fruits for a pop of color.
These finishing touches are what make your mantel uniquely yours. They are like the sprinkles on Grandma’s homemade cakes—delightful and memorable!
A Simple Product Grandma Would Love
If you want to make this even easier, simple tools like a hot glue gun can save time and money without any extra effort. Use it to secure smaller items and prevent them from shifting. Grandma used hers for everything from crafts to quick fixes around the house!
The Honest Truth Nobody Shares
Decorating your mantel is as much about joy as it is about aesthetics. The truth is, it can take time to find the right balance and style that feels true to you and your family. While we often see perfectly styled mantels in magazines, remember that your mantel should reflect your story and warmth—just like Grandma’s home did.
Embrace the process of trial and error. You might find that the perfect arrangement takes a few tries, and that’s okay! Life is about creating not just beautiful spaces, but also beautiful memories around them.
So take your time, enjoy each step of the way, and savor the moments as you create a cozy corner that will bring your family together.
Estimated savings: $20–$50 per project (vs $100+ retail)
Choose one and give it 15 minutes this weekend
You might also enjoy: flower garden tips for beginners
You might also enjoy: homemade snacks and after-school treats


Post Comment